Making Your Own Puppy Treats: Easy and Healthy Recipes
Making your own puppy treats is a rewarding way to guarantee your pup gets natural, healthy ingredients. You'll be using fundamentals like natural peanut butter, overripe bananas, and whole oats, which not only taste great but also support your dog's digestion and immune system. Start by preheating your oven, mixing your ingredients into a dough, and baking them to golden perfection. These delicious treats can be stored in an airtight container and enjoyed for up to a week. With a few easy steps, you can create customized treats that your furry friend will love and benefit from. There's more to uncover on the expedition to homemade goodness!
Essential Ingredients for Treats
When making homemade puppy treats, choosing the right ingredients is crucial for your dog's health and happiness. Start with natural peanut butter, confirming it's made solely from peanuts—no added sugars or xylitol, which are harmful to dogs. This tasty supplement offers a protein punch your pup will love. Overripe bananas are another great ingredient, rich in potassium, vitamin C, and fiber, which support digestion and provide vital nutrients.
Consider using whole oats as a primary ingredient; they're high in fiber and nutrients. You can grind them into oat flour, creating a versatile base for your treats. Healthy flours like whole wheat, oat, or almond flour are excellent dog-safe options, accommodating specific dietary needs without compromising nutrition.
To improve the treats, add ground flaxseed for omega-3 fatty acids, which support a shiny coat and healthy skin. Unsweetened applesauce adds moisture and a lift of vitamins, while dried parsley can help freshen your dog's breath naturally. These ingredients not only make the treats delicious but also guarantee they're packed with valuable nutrients. Remember, using quality, nutrient-rich ingredients is key to creating healthy, homemade treats your puppy will adore.
Nutritional Benefits
How do homemade puppy treats stack up nutritionally? They offer a host of benefits that commercial dog treats often lack. By using natural ingredients, you're ensuring your puppy gets necessary nutrients without the harmful additives common in store-bought options. For instance, natural peanut butter provides protein, critical for muscle development and general health. This means your puppy's building strong, healthy muscles with each tasty bite.
Whole oats, rich in fiber and nutrients, contribute to healthy digestion and maintain stable energy levels throughout the day. Your puppy will have the stamina to play and learn without crashing. Overripe bananas add potassium, vitamin C, and fiber, further supporting digestive health and bolstering the immune system. These elements are important for growing pups, ensuring they thrive.
Including ground flaxseed in your homemade treats improves skin and coat health due to its omega-3 fatty acids, while also supporting the immune system. This means fewer vet visits and a healthier pup. By choosing homemade treats, you're prioritizing your puppy's well-being over convenience. They provide a nutritious alternative to commercial dog treats, ensuring your furry friend enjoys every bite while receiving the nutrients they need.
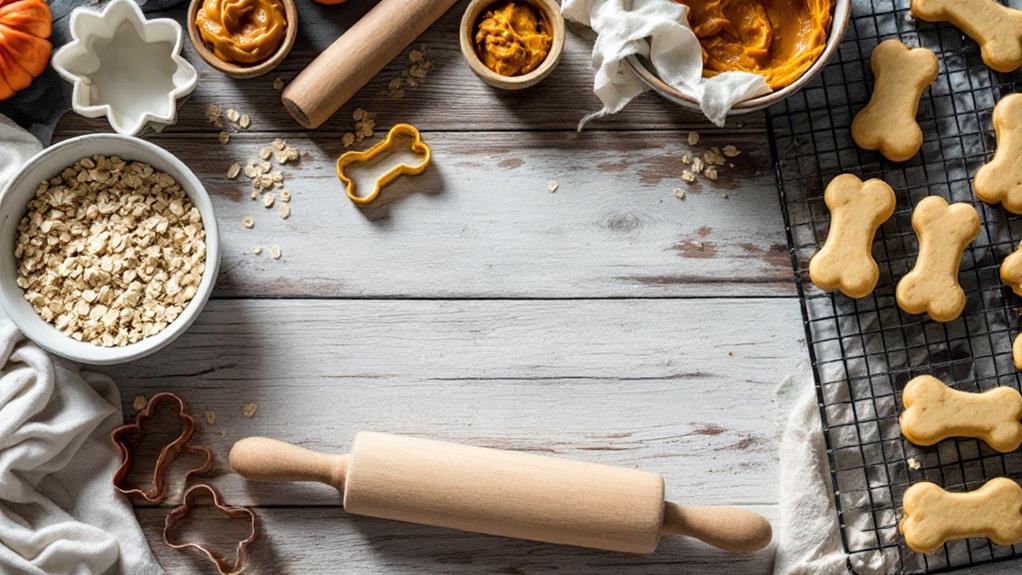
Step-by-Step Preparation
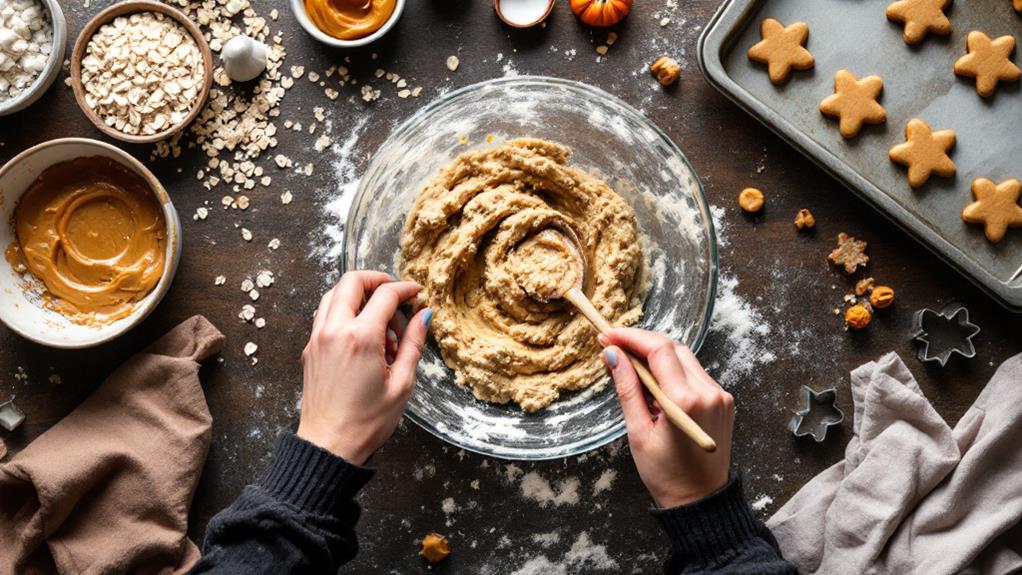
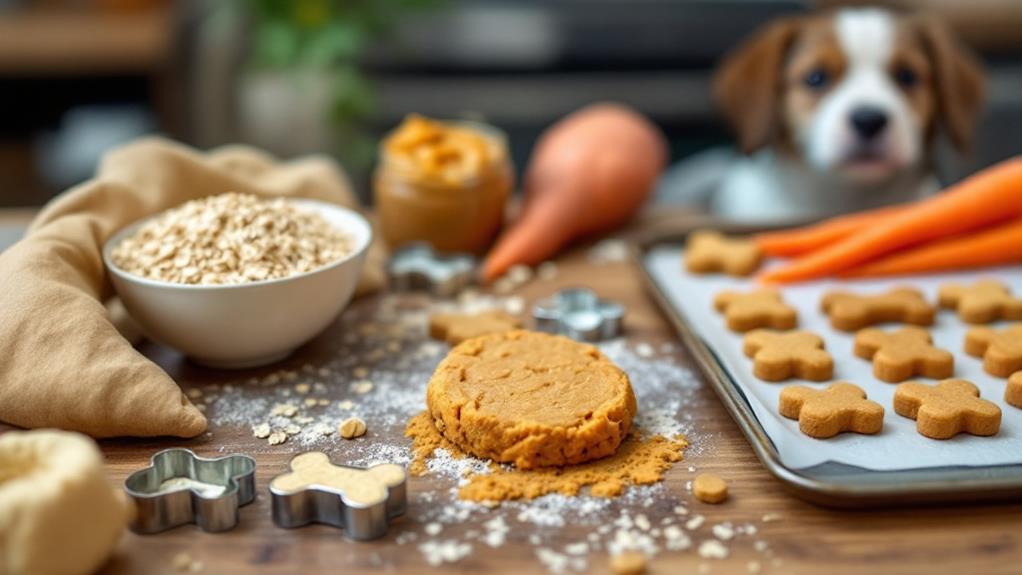
Prepare to whip up some delicious homemade puppy treats with this straightforward step-by-step preparation guide. Start by preheating your oven to 350°F (180°C) and lining a baking sheet with parchment paper. This guarantees your easy homemade dog treats won't stick and are manageable post-baking. In a mixing bowl, combine wet ingredients like natural peanut butter, mashed banana, and eggs. Gradually add in the dry ingredients, such as whole wheat flour and oats, stirring until you form a thick dough.
Once your dough is ready, roll it out on a floured surface to about ½ inch thickness. Use cookie cutters to cut the dough into fun shapes; this will help guarantee even baking. Arrange your shaped treats on the prepared baking sheet. Bake them for 18-20 minutes, or until they achieve a golden-brown color.
After baking, let the treats cool completely on the baking sheet. This cooling process contributes to that perfect crunchy texture your puppy will love. Ultimately, store the cooled treats in an airtight container. They'll keep at room temperature for a week, in the fridge for two weeks, or freeze them for longer freshness. Enjoy your healthy recipes!
Baking Tips and Tricks
You've successfully whipped up a batch of homemade puppy treats, and now it's time to confirm they turn out perfectly every time with some handy baking tips and tricks. Initially, always preheat your oven to the appropriate temperature, usually between 300°F to 350°F, to guarantee even baking. This step is vital for achieving ideal texture and consistency in your treats.
Next, follow these steps to make the process smoother:
- Roll the dough to a thickness of about 1/4 inch. This helps achieve a good balance of softness and crunch. If the treats are too thick, they may require longer baking times.
- Before baking, cover your baking sheet with parchment paper. This prevents sticking and makes it easier to remove the treats once they're done.
- If you're using cookie cutters to shape the treats, consider freezing the rolled dough for about 15 minutes. This helps them maintain their shape during baking.
- Cut them into squares or any shape you prefer, and bake until golden brown and firm. Once baked, allow them to cool completely before you store them in an air-tight container to prevent moisture buildup.
Storage and Shelf Life
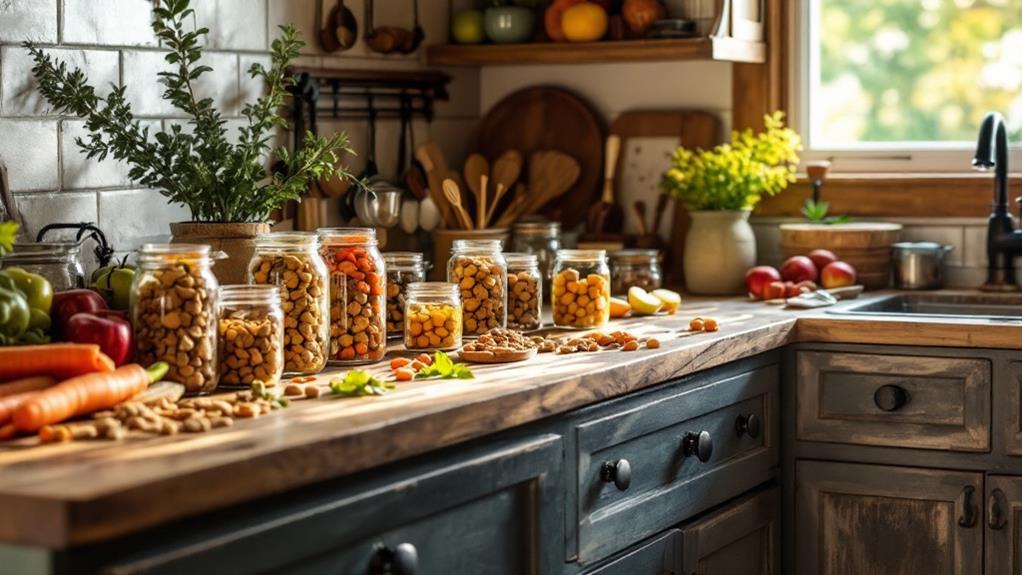
After baking your homemade puppy treats to perfection, it's crucial to store them properly to maintain their freshness and quality. Start by placing the treats in an airtight container, which will keep them fresh at room temperature for up to one week. This simple step guarantees your pup enjoys tasty treats without the risk of spoilage.
If you want to extend the shelf life of your homemade creations, consider refrigerating them. By keeping the treats cool, you can prevent spoilage and enjoy them for up to two weeks. Before storing, make certain the treats are completely dry to avoid any potential mold growth. Moisture is the enemy regarding keeping treats fresh and safe for your furry friend.
For long-term storage, freezing is your best bet. Properly frozen, your treats can last up to three months. To do this, verify the treats are dry and stack them with wax paper between layers in an airtight container. This method maintains their texture and prevents sticking. When you're ready to serve, simply thaw the desired amount and watch your puppy enjoy these tasty, safe, and healthy treats.
Health Considerations
While storing your homemade puppy treats properly guarantees freshness, it's likewise crucial to take into account the health implications of their ingredients. Dog allergies are common, and you should monitor your pup for reactions to ingredients like wheat, soy, and flaxseed. Homemade treats can be a wonderful supplement to your dog's diet, but you need to confirm you're using safe ingredients. For instance, if your dog has wheat allergies, you might opt for gluten-free flours.
Before making any treats, consider these health tips:
- Veterinarian Consultation: Always consult your vet about any specific dietary concerns or allergies. They'll help guide you in choosing the right ingredients.
- Moderation: Limit treats to 1-2 per day and confirm they don't exceed 10% of your dog's daily caloric intake. This keeps your dog's diet balanced.
- Healthy Fats: Use ingredients like peanut butter for healthy fats, but make certain it's free from xylitol, which is toxic to dogs.
- Safe Ingredient Alternatives: Substitute ground chia seeds for flaxseed if your dog has flax allergies.
Taking these considerations into account will help you create delicious and safe homemade treats for your puppy.
Recipe Modifications
Tailoring homemade puppy treats to meet your dog's dietary needs can be both fun and rewarding. Recipe modifications allow you to cater specifically to your puppy's preferences and health requirements. If your dog needs gluten-free options, contemplate using almond flour instead of whole wheat. This substitution can keep treats safe and delicious for gluten-sensitive pups. For binding ingredients, try ground chia seeds in place of flaxseed.
Adjusting the baking time and dough thickness can greatly affect the treat's texture. Thicker dough requires more time to bake thoroughly, resulting in firmer treats. If you want softer treats, decrease the baking time and make moisture adjustments by adding more applesauce or peanut butter. These modifications can keep your puppy's snacks chewy and enjoyable.
Adding ingredients like pumpkin puree can enhance the nutritional benefits and flavor appeal of the treats. However, it's vital to take into account any allergy considerations your dog might have. Always consult with your veterinarian before making ingredient substitutions to guarantee safety. By carefully selecting ingredients and testing different dough thicknesses, you can create customized treats that are both healthy and delightful for your furry friend.
Dog Treat Variations
Crafting homemade puppy treats isn't just about adjustments for dietary needs; it's also about exploring a wide array of delightful variations. By experimenting with different ingredients and flavors, you can create treats that your dog will love. Here are some ideas to get you started:
- Sweet Potato Chews: Slice sweet potatoes into thin rounds and bake them until crispy. These chews are not only tasty but also provide nutritious treats rich in healthy fats and vital nutrients.
- Pumpkin & Peanut Butter Treats: Combine pumpkin with natural peanut butter for a seasonal treat. This dog treats recipe is packed with fiber and vitamins, making it a favorite among dogs.
- Peanut Butter & Carrot Treats: Mix peanut butter with crunchy carrots for a blend that offers protein and vitamins. These carrot treats are an excellent choice for a nutritious snack.
- Customizable Variations: Use different flours like oat flour to cater to dogs with specific dietary needs. Oat flour is a great option for adding texture while staying dog-friendly.
Community Feedback
Engaging with the community reveals overwhelmingly positive feedback on homemade puppy treats, with many dog owners sharing stories of their pets' delight and satisfaction. A popular dog treat recipe boasts an impressive 4.92 rating from 61 votes, highlighting its appeal. Owners express gratitude for the simplicity and health benefits these recipes offer, making them a staple in many households.
When it comes to ingredient substitutions, community members often discuss options, addressing common concerns about safety, especially regarding peanut butter. Many users seek confirmation on ensuring their chosen products are safe for dogs, emphasizing the significance of avoiding harmful additives like xylitol. This collective vigilance contributes to a safer recipe experience for everyone involved.
The community thrives on sharing experiences and tips for enhancing recipes. Suggestions like using alternative flours or adding nutritious ingredients such as flaxseed or pumpkin are frequently exchanged. These interactions foster a collaborative environment, enriching the recipe development process and ensuring the treats remain both delicious and advantageous.
Feedback loops in this community are crucial. They encourage you to exchange ideas, allowing you to uncover new ways to make your homemade dog treats even more enjoyable for your furry friends.
Reader Engagement
Many dog owners find joy in connecting with fellow pet enthusiasts, making reader engagement a vital aspect of the homemade puppy treats community. Engaging with others through comments and feedback not only fosters a supportive environment but also allows you to share your experience and tips for crafting the best treats. By actively participating, you contribute to a thriving community where everyone can benefit.
To improve your reader engagement, consider these strategies:
- Encourage User Interaction: Invite readers to suggest ingredient substitutions or modifications, creating a more personalized cooking experience.
- Solicit Positive Feedback: High ratings and positive feedback elevate your recipe's credibility, encouraging others to try making homemade puppy treats.
- Share Success Stories: Post photos or stories of your dog enjoying the treats. It inspires others and increases engagement, as readers love seeing real-life results.
- Respond Actively: Answer inquiries and connect with readers. This builds trust and motivates them to return for more recipes and tips.